![]()
![]()
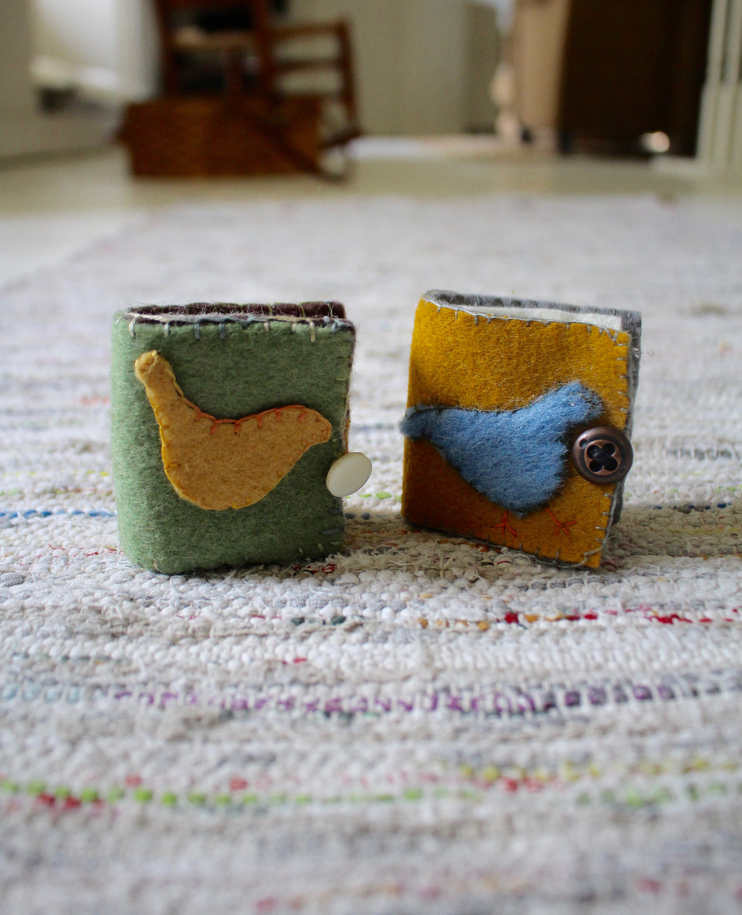
Happy new week, friends! I’ve been working on some darling felted needle books and I thought some of you may like a little tutorial on the process. They are small enough to toss in your bag for projects on the go, and would make a precious gift for a fellow crafter in your life. Speaking of sewing, Stella and I went to the fabric store the other day and came home with several new beautiful fabrics for projects this year. She wants me to make her a dress, and I’ll also be sewing new pillow covers, a small bed quilt, and a few other home goods to have around here as we approach the wintertime. Anyway, I love having a variety of handwork projects to pick up and work on here and there, especially when the weather cools down, and these felted cuties are perfect for that. Here is a simple tutorial on how to make them:
Step 1: Gather materials
- 3-4 pieces of wool felt
- Threading needle
- Thread
- Sharp scissors
- A button
- And a cup of tea (because why not)
Step 2. Cut the felt
- Two 6 x 3 inch rectangles
- One 5.5 x 2.5 inch rectangle
- One symbol to go on the front, like a bird, star, or heart.
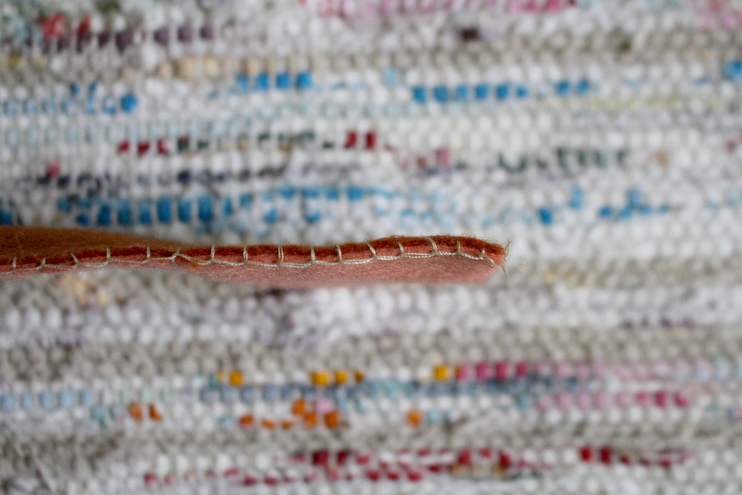
Step 3. Sew the book together
- Laying the two largest rectangles on top of one another, sew a blanket stitch around the entire two pieces of felt, binding them together. I doubled up my thread to make the stitch sturdier, but this is optional.
![]()
![]()
Step 4. Sew the symbol on
- Make sure whatever symbol you choose for your project will fit nicely on one side of the book. I like the look of these little birds, but anything will do. Attach using a blanket stitch again, and add any details if you’d like.
![]()

![]()
Step 5: Add the center felt.
- Once your book is sewn and symbol attached, place the smaller rectangle of felt in the center of the book on whichever side you would like. This will be the inside of the book housing the needles. Sew the center where the spine of a book would be so it stays put. You do not need to blanket stitch anything here. I simply attached the ends with a knot and weaved through twice, nothing fancy.
![]()
![]()
![]()
Step 6: Add the button
- With your book lying open, sew a button on the far left side of the book in the middle of the felt. On the opposite side, sew a loop large enough to fit over the size of button you’ve chosen for your book. Again, nothing fancy, just make sure it’s big enough and strong enough to stay closed.
![]()
![]()
![]()
Step 7: Fill ‘er up!
- Rummage around your sewing kit and gather all the needles you can find. Give them a home in their new felted book, and do a little happy dance because your project is complete!
![]()
![]()
![]()
For those wondering where I came up with this craft, I am happy to share that it is not my own idea! I am a part of a weekly Waldorf parenting class, and our instructor made these to share with us. Once a week I gather with other parents and we make things with out hands and talk about Waldorf philosophies etc. while our kids play and learn together. It’s a really lovely and uplifting time, and one I always look forward to. These felt books are such a simple and rewarding hand work project, and I am happy to pass the inspiration along to you! I also think this would be a cute tooth fairy book if you added a small felt pocket to the inside, rather than a sheet of felt to hold needles. And then the symbol on the front could be a big ol’ tooth. How precious would that be? I am going to be making one of those this month because Stella has reported a wiggly one, her very first! Happy sewing, friends.
Helmi - Beautiful, love this!
Crafty Crafts - - […] Found here […]