![]()
![]()
![]()
![]()
![]()
![]()
![]()

![]()
![]()
![]()
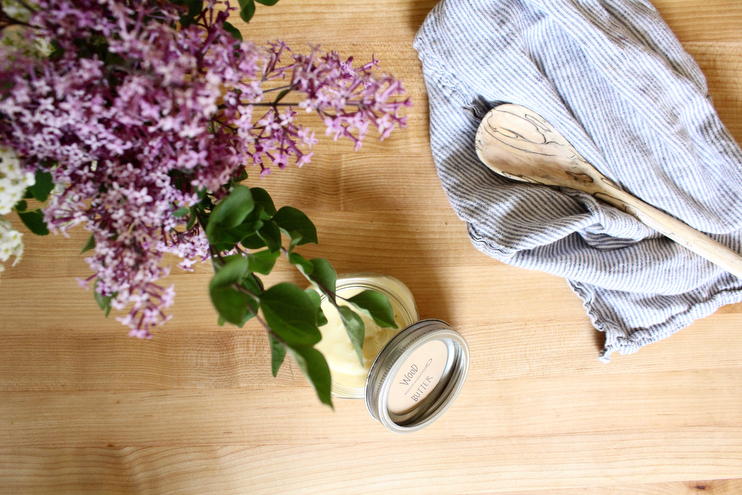
For those of you who have a big ol’ butcher block or wood countertops or really anything made of wood that could use a little extra care and lovin’: spoons, cutting boards, plates, juicers, teethers, baby toys, blocks etc. this one’s for you! So basically everyone, ha. Here you are dears, a little tutorial on how to make the most of all things wood with two natural, non-toxic ingredients.
Every few months Andrew or I take this buttery concoction and treat the big butcher block that anchors our kitchen, plus all the other wood trinkets we have around our home. Depending on the wear of my wooden utensils and bowls, I’ll coat that when we do the island and give it a hearty buff for good measure. This simple product puts life back into the wood and moisturizes it, keeping it from drying out and cracking.
Ingredients:
- Coconut oil
- Beeswax pellets
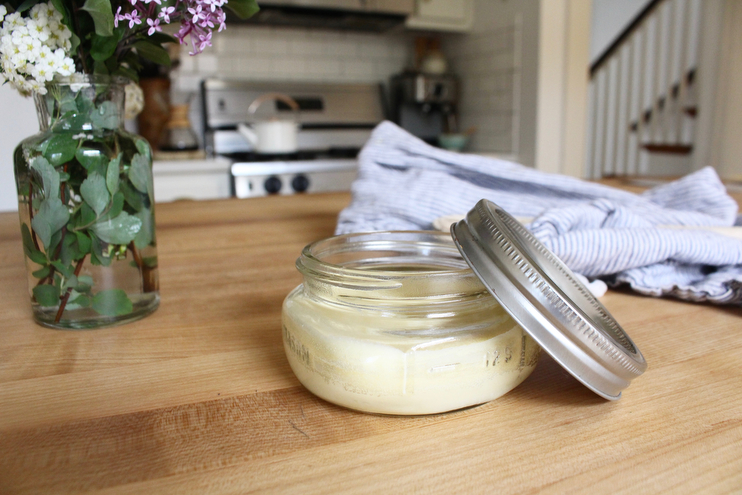
To prepare, measure out a 1/4 cup or so of beeswax pellets and 3/4 cup or so of coconut oil and put them in a glass jar. A mason jar is perfect for this. And you should know, I usually eyeball this recipe like I do most everything in the kitchen which is why baking and I aren’t the best of friends. I prefer beeswax pellets to buying a block of beeswax because they melt much faster and are easier to work with. If you are wanting to breaking off bits from a big, hard block go for it! I opt out of this one and use the pellets. For the next step, set the glass mason jar in a pot, say your dutch oven, and fill it with several inches of water. Let the water simmer (avoid boiling) and as it does it will melt the beeswax and coconut oil together into a beautiful, golden, buttery concoction.
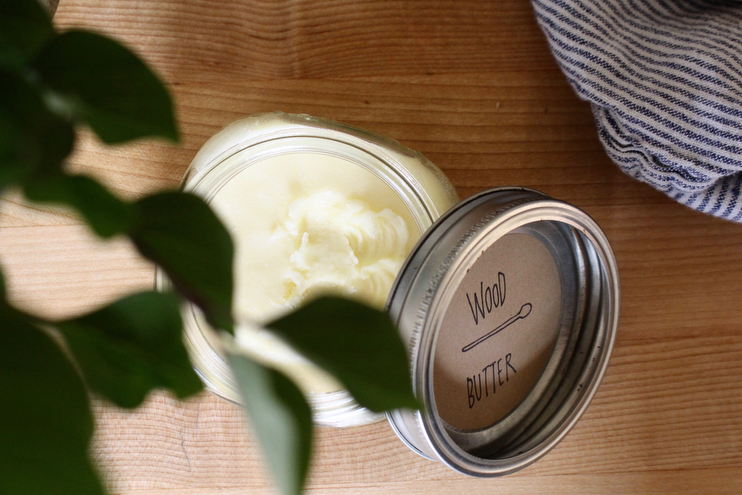
Once melted, you can take this jar and leave it as is on the countertop to cool and set. Make sure to place it far away from where little fingers can reach. Another route you can go is to pour it into smaller jars once melted and give these away to friends for birthdays or holidays. I sent this out as a little Christmas gift a few years back with some small wood cheese knives. It was a big hit! My mother in law still uses the mixture I made on all of her wood spoons and cutting boards, proving that a little of this wood butter goes a long way. No matter the size of jar, large or small, there you have it. A simple recipe for conditioning your wood that uses all-natural, wholesome ingredients sans mineral oil!
Using this butter couldn’t be easier. With an old towel, try to stay away from the paper variety, rub in the butter very liberally and let whatever you are conditioning sit overnight. Better yet, leave it alone for 24 hours. In the morning or whenever you get around to it, take another old towel and buff the wood, rubbing the butter in even more. That’s literally it. Also, your hands will be really happy after you’ve used this butter. Think of it as your cuticle treatment! Happy conditioning to ya.
Allie - Great idea! I’ll be using this on my wood items around the house! On another wood related note- I wanted to ask where your wood salt and pepper grinders are from? I saw them on IG a while back. Have a good day mama!
admin - Allie – Andrew got me those for Mother’s Day last year from a local store here in KC that sells kitchen items but I found these that are really similar! http://www.surlatable.com/product/PRO-1025972/Berard+Olivewood+Salt+and+Pepper+Mills x Amanda
Allie - That was so kind of you! Thank you so much. You really are such a wonderful person.
Kylie - Love your bright kitchen! I want to try this on my wood handle steak knifes! Do you know if there is a difference between white and yellow beeswax?
admin - Kylie – Thanks dear! I love how bright it is in there. So many old windows. 🙂 I think the white wax has been treated or bleached so I would read about that if you are wanting a clear color. I prefer the natural look of the soft yellow and find that it doesn’t affect the color of anything we treat! x Amanda
Amanda - Love this! My wood cutting boards could use some love. Do you have any trouble getting the butter out of your towels? Do you wash the towels by themselves (not sure if the wax would affect the other laundry)?
admin - Amanda – We buff them with old IKEA towels and then I store them under the sink and separate from the other towels. I don’t even wash them! If you need to wash it I would do so by hand and then let air dry. I don’t think the trace amount of beeswax could hurt the washing machine but you never know, right? x Amanda
Amanda - Thanks! <3
Nicole - Wow I love this post. I have been treating my gifted handmade cutting board with walnut oil. Its not my favorite scent, but the ‘gifter’ said to use walnut oil or mineral oil because they were the only two that won’t go rancid over time. Is this true for the coconut oil too? Also where do you get the bees wax pellets? Amazon? I live in a small town in No Dakota with limited stores. Thx again. Love this blog. NB
Bifrost Photography | Link Round-Up - […] I’m liking the look of this two ingredient wood butter. We’ve got two wooden chopping boards at the moment, and this would be perfect for […]
Amber - Wow. So simple. Thank you! I’ve been wanting to find a simple wood conditioner recipe.
Liz - I know you’re just doing your thing and this is pretty much your livelihood… But homegirl, advocating terrible products for some money is a pretty big reflection of character. I’ve loved following along up to this point. This saddens me.
Kristan - Ugh, people can be so self-righteous, judgemental, and cruel. ☝🏼️ I hope you don’t let this whole Miracle Gro thing get you down. It’s ridiculous that people feel the need to be so nasty, but when you can type words and hide behind a screen, it becomes easy for them to be mean and not think twice about it. I’m sure that the people who felt the need to let you know about MG have NEVER used products containing chemicals or were less than friendly to the environment. 🙄 Keep doing what you’re doing, mama. Lord knows being a mom and providing for your family is hard work and you don’t have to answer to or explain yourself to anyone other than…well, you! Sending love and good vibes your way. Please don’t be too hard on yourself with all this.
Danielle - Amanda, thank you for providing the instagram community with a platform to learn and grow from one another. I don’t understand the mindset of those who think just because you have a large following means you have to get it right all the time. The way you spread positivity even when responding to criticism is refreshing and inspiring. As I’ve told you before, you’re something special and I admire your ways so, so much. Please don’t change who you are. Ever.
Jacky - Hey Amanda,
I follow you regularly on instagram and recently you posted a photo in your kitchen with a picture on the wall that looked like dried flowers. I was hoping you wouldnt mind sharing where it was from or some tips if you made it yourself 🙂
Thank you!
Jacky
Elizabeth in Paris - Where do you find beeswax pellets? Would love to know a reliable source! Many thanks!
Elizabeth
Mary Bower - I’m really kind of of confused as to why you take so much credit for white paint in your design sponge article. I guess no credit is due for the original owner.
http://www.thenatos.com/2014/01/kitchen-renovation-before-and-after.html?m=1
admin - Mary, please read the above. If you still feel the need to discuss email me or contact DS. Thanks. x Amanda
admin - Or rather, the below…my response to Amalia’s comment.
Samantha - pssst amanda, The actual renovator has a blog post about your house before you bought it from the Natos, with? where is your writing etiquette? you should be embarrassed. stop taking credit for the renlovation of that house, you did nothing but paint it all white!
admin - Samantha, please read the above. If you still feel the need to discuss email me or contact DS. Thanks. x Amanda
admin - Or rather, the below…my response to Amalia’s comment.
Amalia Paiz - I say with sincerity and I hope you take the time to read. That article that design sponge did on your house was great, great and misleading as well. Im a follower of the Natos on Instagram and have seen the renovations that they did to that house WHICH YOU TOOK CREDIT FOR. Don’t you have any shame at all? you even said on the article that you documented the renovations on your blog? I believe the Natos did:
http://thenatos.com/2014/01/kitchen-renovation-before-and-after
I honestly cannot believe you are friends with them. You could have said in the design sponge article that you knew the person that sold the house to you guys and most of the renovations were done before you guys moved it. You didn’t even picked the light fixtures, Jami Nato did. All you did was repaint, bought in your own furnitures and thats it.
Btw, your so called “Taking a break” from Instagram, how long will that last? more post on the blog for more chance of sponsorships?? smart and desperate move.
admin - Hello Amalia,
I considered deleting this comment due to it’s absurdity but figured to those who also have lingering questions it may be good to share your post and follow up publicly about all of this. I too was very saddened by the DS article, which I am sure you are well aware I did NOT write…DS writer Sabrina did. I submitted an interview to them and they wrote an article adding their own words like “restoration” and “renovation” of which I did not give permission nor include in my interview. I have received a lot of negativity from this article and it saddens me how harsh people can be out there given they do now know the full story but feel so inclined to bash nevertheless. We are good friends with the Natos and I did credit the renovations to the former owner but the writer of this article chose not to include them. Perhaps you will not believe me because it feels as though you are out to get me and hurt me regardless, so here is my interview. Read it and compare to the DS article. I would hope in the future for everyone you send a hurtful message to you would FIRST consider kindness. Bless you. x Amanda
Design Sponge Tour Interview:
BIO. Please tell us a little bit about yourself and the people who live in your home. *
I am a stay at home mom and look after our three little ones, Stella 4, Theodore 2 and Alfie almost 1. I was born and raised in the Midwest and like a good ol’ cliche married my high school sweetheart, Andrew. We moved to Kansas City to have and raise our family where I taught for four years before leaving that to stay home. I write a blog called Homesong about home keeping and slow living with kids. It’s a passion and joy of mine to be able to do so! Andrew works as financial planner and loves his job. Our little ones enjoy adventuring around the yard, making crafts, helping mama in the kitchen, digging in the garden and playing with their toys.
HOW/WHY DID YOU CHOOSE YOUR HOME and your neighborhood? What were you looking for and what made you know this was the one? *
The story behind choosing our home is an interesting one. We had been on a search for an older, larger home in the same historic neighborhood we currently lived in whilst in a small condo, but every time something we loved came on the market it was scooped up too quickly! This area is gorgeous with all of its parks and trees and growing families. We were told of this home and it’s potential to go on the market from my best friend. This house was a friend of hers and we arranged to take a look at it one evening, not really hoping for much. Andrew and I pulled up to the cobblestone walkway and saw the big side porch with a big tree swing and we immediately felt in love. Walking through the house itself and seeing all the preservation with regard to the original features made this house that much more appealing to us. It ticked all the boxes on our wish list so we put an offer on it that night and didn’t look back. It has always felt like home here.
Tell us a little bit about your PROCESS of turning your space into a home. How long did the process take? If there are any interesting stories that happened along the way, do tell!
The first major step we took to turn this house into our home was to paint everything. There were multiple layers of paint and wallpaper on everything (ceilings included!) and that took a bit of work to get off. The walls needed many coats of paint but once finished the results were night and day. We opted for neutral tones in the white family to freshen everything up and show off all the charm in this home. With so many beautiful features like built-ins and gilded lighting and original tile work, the neutral pallet really lets these beautiful, old parts of our home shine. Two years later we are still doing things here and there to turn this into our dream home, but from the start it has always been a joy to live here.
What is the most CHALLENGING part of your home? Is there an area that’s just not quite working yet? A part you you want to renovate but can’t yet? *
We are currently in the process of giving the front of our home a complete face-lift. The bushes and shrubs are all overgrown and the grass is really patchy. With as often as we are in the yard, it is important to us to have a beautiful and comfortable outdoor space too. We completed the back yard and made a pergola and hung a wood clothesline and it’s beautiful. Now onto the front…but we are sourcing old brick and that takes a bit of time! Since this house is so old, everything we do must be customized. Shutters, window boxes, the front door…all of it is a long process to design and order. We are getting there and hope to be done by the middle of this summer.
What were your DECORATING GOALS with the home overall? How do you need your home to function? (For example: “We wanted to create a clean modern space that was still child-friendly.” *
Because I stay home with the kids it was very important to us to make each room family friendly and comfortable for each one of us. I wouldn’t say we sacrificed beauty for functionality, but rather made it our mission to blend the two. I love decorating and moving things around and we’ve managed to create a simple and calming space to live in that also encourages creativity and imagination. A little intention goes a long way and we feel like this home is a true reflection of us as a family.
Are there any SPECIAL OR UNUSUAL ASPECTS OF YOUR HOME that readers should know about? *
Other than the neat fact that this home is almost one hundred years old, it’s special to us that this home still has so many of its original features. The shaker style pantry in the kitchen, the living room wall lighting, the wood floors, the tiling in the upstairs bathroom, the enamel sink and tub, the chandelier, the heavy doors and pulley windows. All of these things are just so beautiful to us.
What are you MOST THANKFUL FOR about your home? *
We are thankful for space it gives our family each day to do the things we love. I am an avid cook and treasure this spacious kitchen, in the spring and summer the kids paly outside in our garden daily, we light fires daily in the winter and in autumn our home is draped with a blanket of colorful leaves towering overhead. It’s truly a magical place to live and is a haven for us. We are thankful to get to do life here with one another. That, in and of itself, is a gift.
Dina - Thank you for posting this! I just made it last night and I can’t wait to try it! I told my husband what it was and he thinks I’m crazy because we have a bottle of mineral oil, but I never use it because I don’t like the idea of it. I told him I might actually take the time to condition our wooden countertop now that I have something I’ll enjoy using (and that smells so good!).
admin - Dina – I am glad you made this! You’ll love how buttery soft it makes your countertops (and hands!). Thanks for stopping by! x Amanda
Essential Oils: Natural Cleaning - Bird is the Word - […] furniture and more, I rub this block oil on everything. Eventually I’ll make some of my own Wood Butter (1 part coconut oil + 1 part beeswax pellets) but until then, this lemon-y fresh stuff is doing […]
10 Cleaning & Simplifying Tips at Home For the New Year » Homesong - […] wooden spoons, cutting boards, butcher block, and furniture included. You can make this homemade wood butter (it’s just two ingredients) and go to town on anything that needs a good conditioning. […]
Chelsea Beckman - Hey Amanda! I know this an old post, but I just came searching for it because we just put an island in our kitchen with a butcher block top and I remembered you had posted about this! Thank you so much for the recipe!
I have to ask, did you leave your butcher block otherwise untreated? People are pushing me to stain or at least seal our island, but I love the way that it looks naturally, as it is. I obviously don’t want to ruin it, so I’m hoping that not sealing it and just using this concoction to treat it will be just the ticket.
Hope you are well friend!
Xxxo
Chelsea
admin - Chelsea, hey hey! This recipe is one of my favorites, it’s so conditioning. We left it untreated and I would absolutely do it again. My mother in law got there’s stained and sealed and I really do not care for it because instead of a butcher block, it is now something you cannot cut on. I think if you are planning to do a lot of hands on cooking in the kitchen, leaving it untreated is magic. Yes, you do have to condition it and take care of it more, but I think it’s SO worth it. I condition ours once a month or so, more in the winter time if need be, less in the summer, and then sanitize it with Thieves oil spray. Hope this helps dear! x Amanda
Bedtime Rituals + Sleepy Essential Oil Recipes » Homesong - […] up a batch of bath tub scrub or any other homemade natural cleaning solutions? Laundry cleaner? Wood butter? Deodorant? Or owie balm? When you stock your pantry with quality natural ingredients, you find […]
Marci - I just used your beeswax and coconut oil recipe for sealing my butcher block countertops. I love how it looks, and I love that it’s an all-organic, totally non-toxic finish! However, any time I put a warm plate or mug on the countertop, I am left with a rough, discolored patch. I think it’s just the wax coming to the surface and then drying. How do you deal with this issue?
Thank you!
admin - Hi Marcy, I have not encountered this, I am sorry! I think it must be the oil in the wax, as you say, absorbing whatever is on the counter top? Hmmm. xx Amanda