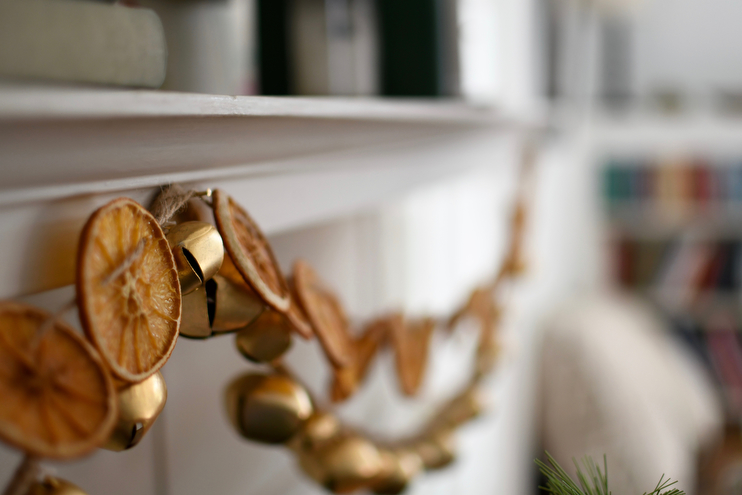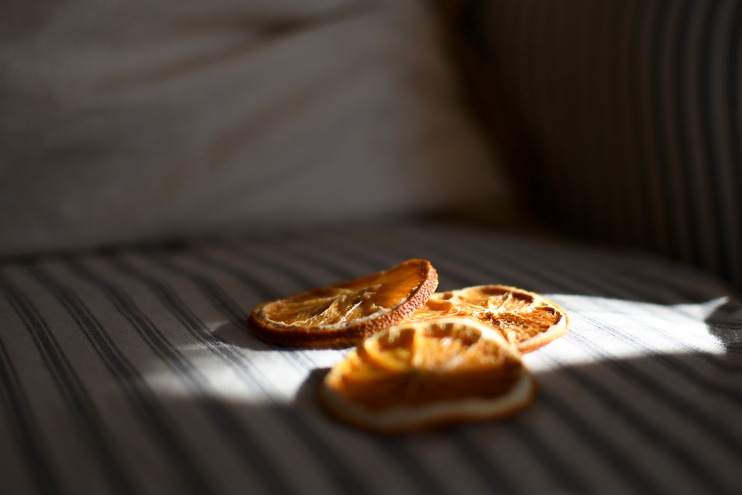


It’s the Sunday after Thanksgiving and we haven’t gotten our Christmas tree, but we’ve got oranges! Lot’s-o-oranges! I’ve got a string of dried ones hanging above the bells on our mantle, a few tucked into tiny pines around the house, some in jars to top gifts next month, several waiting to become ornaments, and another whole other batch in the oven as we speak, drying their way into yummy treats for the kid’s lunches. We all found out last week that they’re pretty tasty, too. I don’t know where or exactly when the dried orange decor originated, but I know they go way, way back. I also know that every time I see an orange during the holidays I think of my grandma, who always gifts us a gigantic one for Christmas. She’d first wrap it up in cellophane, and the some sort of wrapping paper with a little tape as she could muster, the piece of fruit looking undeniably orangey. I also know that most primitive and early Americana decors shops around the Midwest and New England areas have them sprinkled everywhere during the holidays. They are usually included in most spiced potpourri pots and baggies, and they are staples in most rustic kitchens in the winter. Dehydrated oranges are so simple to make, and are really beautiful no matter where or how you decide to use them. Below is a step by step guide to making your own dehydrated oranges without a dehydrator, after which you can turn into a variety of Christmasy gifts and goods for around your home!
Ingredients + Tools:
- Lots of medium sized oranges
- Baking sheets
- Cotton or paper towels
- Oven
- Mandolin slicer or very sharp knife
- Jute string
- Dull threading needle
Step One: Preheat your oven as low as it will go. I set mine at 170 degrees, but 200 would work just fine.
Step Two: Slice the oranges 1/4 inch thick using a mandolin slicer or very sharp knife. You will want to cut them width wise, starting at the bottom of the orange so they make a star pattern in the middle. Slice as many as you care to make, and place them on top of a cotton or paper towel to dry.
Step Three: Once you’ve cut all the oranges you care to dehydrate, cover the top of the ones you’ve already cut with another cotton or paper towel and press gently to absorb the moisture. Do this several times before transferring the oranges to a nonstick baking sheet.
Step Four: Bake the oranges for 4 hours and turn them over. Bake for another 2 hours, or until they do not bend when you pick them up. If you take an orange slice out of the oven after the total 8 hours of low baking and find that they still flop when shaken, they need more time. If you take an orange slice out of the oven after the total 5 hours of low baking and find that they are firm and crisp when shaken, they are done. Just make sure to check your oranges every few hours or so to make sure they do not over or under bake.
Step Five: Rest the oranges on a drying rack overnight before using for crafts. If you find that one of the oranges is still a little juicy after it has dehydrated and rested overnight, use it for something else, like a salad dressing. The moisture means it has potential to mold, and we do not want that!
Step Five: If you choose to make a garland with your oranges, first measure the length of your garland using a piece of jute string. After measuring, cut your piece of jute to size, making sure to leave about 10 inches of leeway on both sides to tie. Using a dull threading needle, thread the jute back and forth through the top of the dehyrtated orange near where the pith meets the fruit. This is the sturdiest place to secure the string for hanging. I chose to string my oranges very close together because I like that look, but you can make your garland as close together or as far apart as you like. You could also add pine cones in-between oranges as well. Ya slice ’em – ya dry ’em – ya string ’em!
This craft will keep well throughout the holidays if properly dehydrated, but will darken over time. You can also use these to make ornaments a several other holiday gifts. I am going to do a tutorial on a few more ways you can use them around the house, so if you make these be sure not to toss the ends of the oranges! Instead, put them in a jar and cover and cap with distilled white vinegar. I’ll be showing you a simple way to make all-purpose cleaning spray with your orange scraps later on this week.
With Care,
Amanda
.jpg)
Madelyn W - I’m so excited to make orange garland with my family for Christmas. Thank you for this lovely idea. Amanda, do you think I could use my dehydrater instead of the oven?
admin - Madelyn, yes, of course! I do not have one but so I am unsure of the cooking time, but I assume it would do the same job. 🙂 x Amanda
Julia - Love this!
I see that they last through the Christmas season…but do you think they last year to year (or even to next year) if stored in cool, dry place? (Maybe they’ll get too shriveled…?)
Also, where did you get your bottle brush trees?? I’ve been looking for similar ones!
Tysha - I can almost smell them! We have a tradition of wrapping up a bunch of books to use as an advent, with a corresponding activity with each book. We read the book “Christmas Oranges” and then enjoy making garlands such as these. The story is a beautiful, touching one about an orphan girl (I won’t give away the story) – but it gives you an idea of the value of an orange in days long ago, perhaps that is when the tradition began? Anyway, beautiful! Yours looks lovely!
Ways to Feel Festive this Christmas - Polly Rowan London Lifestyle Blog - […] This makes your home smell amazing as well as warming it up! It’s so simple to do but makes you feel all cosy. Slice up as many oranges as you like, 1 – 2cm thick and gently squeeze out some juice without damaging the orange. Arrange on a grill and bake on 100*C for 2 – 3 hours. Basically you want them to dry out but not burn. Then you can either add them to your wreath or string them up like this! […]
Lovely Links - Heather's Dish - […] How gorgeous is this dried orange garland?! […]
Frivolous Friday – Chasing Cozy - […] Holiday orange DIY […]
Kathryn - Just saw this for the first time and I love it! Thank you for inspiring me.
Kathyryn
Bifrost Photography | Link Round-Up - […] We made dried orange ornaments last year, so I’m feeling pretty keen to give this dried orange garland a go this year, time permitting. We decided to get our tree yesterday (!) so I might get started […]
Nadya - I tried this at home today and even though many of my slices aren’t completely dry many have turned brown. How do you get them to stay pretty and dry out? I baked for about 6 hours flipping every hour or so
The Grocery Store Solution for Unique and Beautiful Holiday Decor — Apartment Therapy – Mediasota - […] (Image credit: Homesong) […]
Mary Oliver & A Seasonal Simmer Pot » Homesong - […] 2 dried oranges […]
Holiday Cookie Exchange Party + Chewy Candied Ginger Snap Molasses Cookies » Homesong - […] To prepare, gently simmer all the ingredients (except for the wine) on the stove for 30 minutes. Stir in the wine and heat through. Serve warm in mugs with a dried orange slice. […]
Krisi Ingram - Hello…
For the garland on your mantel with the gold bell garland, how many oranges did you use?
5 Trending DIY Pinterest Projects For Christmas - US Mobile Home Pros - […] and colorful even without the glitz of a glittery plastic globe. For example, take a look at this garland made from dried oranges – you can make it yourself at […]
3 Easy, Eco-friendly Holiday Decor Ideas - Seed Babies - […] followed these instructions for mine. I love to drape this garland on my tree, the twinkle lights give the citrus slices a cozy […]
Pamela Dampier - I put string on my dried oranges so I cut the string off before I store them until
Next year
Maija - Hi there!! This isn’t related to the tutorial, but where did you get the wallpaper in your living room? It’s just gorgeous!
Decorațiuni handmade pentru Crăciun – ALEGERI POTRIVITE - […] feliile sunt complet uscate. Lasă-le să se răcească și apoi înșiră feliile pe o sfoară, ca să faci o ghirlandă delicioasă și […]