![]()
![]()
![]()

![]()
![]()
![]()
![]()

![]()
![]()
![]()
![]()
![]()
![]()
![]()
![]()
![]()
![]()
![]()
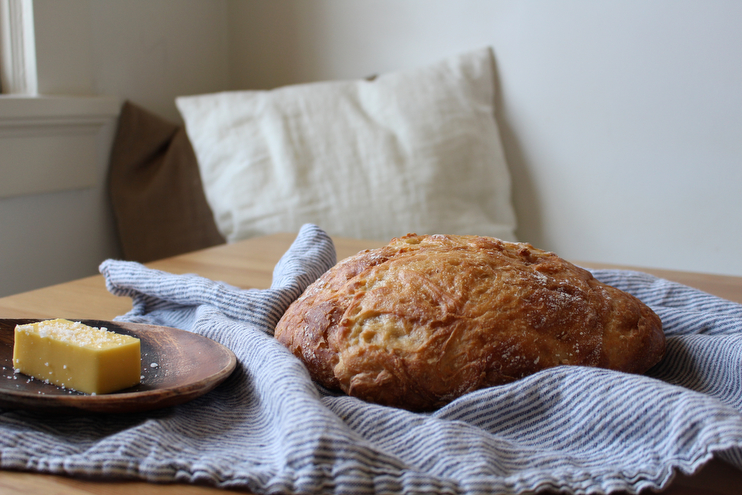
It was one of my personal goals to try out bread making for the very first time this winter season. Baking comforting food and hibernating indoors is a good combination I think, and there’s nothing better than warm homemade bread with good butter. Because I am someone who prefers creative cooking, you know a little bit of this and a little bit of that as I go, the seemingly limited qualities of baking left me uninterested until recently. But more than that, almost everything I have baked up until this point just hasn’t turned out quite right…all except pie. I can whip up a mean pie! Since my cookies are always a bit burnt or my cakes a little too dry, I just assumed baking wasn’t my craft. In light of that, I left it to our favorite local bakeries to churn out breads and pastries when we wanted a homemade treat.
That is, until I made this no-knead recipe which I cannot recommend enough. Novice baker or not, you really should try it out. It’s simple and straightforward and very satisfying. Ever since our first go at making bread turned out so wonderfully, we have been making this recipe just about each week. On Sundays after church we’ll get out the flour and yeast and salt and fill our ceramic pots with dough to rise. Sometimes, depending on our meal plan for the week ahead, we’ll mane two or three batches because it is just so easy!
The kids are at the best age where they are really eager to help me in the kitchen. As soon as they hear me digging through cupboards to cook, they come in one by one and grab a stool to help stir or pour. For this bread recipe, they enjoy dumping the measured ingredients into the bowls and then stirring. They also love taking peeks at the dough to watch it rise throughout the day. And then, the best part, eating a slice with creamy, salted Irish butter and raspberry preserves. Here’s Mark Bittman’s recipe laid out for you the way we make it, enjoy!
Ingredients:
3 cups all-purose organic flour (white has always turned out best for us but you could try whole wheat)
1/4 teaspoon instant yeast
1 1/4 teaspoon salt
1 5/8 cup of water
cornmeal of wheat bran as needed
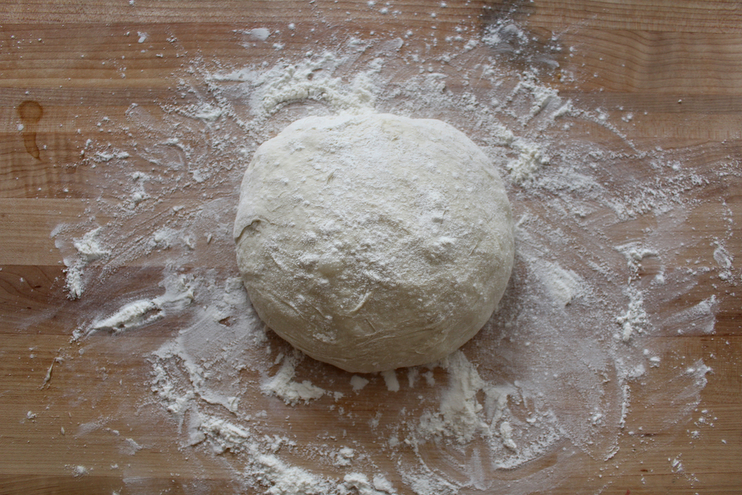
To prepare, combine flour, yeast and salt in a large bowl. Add 1 5/8 cups water, and stir until blended; dough will be shaggy and sticky. Cover bowl with plastic wrap. Let dough rest at least 12 hours, preferably about 18, at warm room temperature, about 70 degrees. We let ours rest on top of the fridge because it’s warm there. The dough is ready when its surface is dotted with bubbles. Lightly flour a work surface and place dough on it. Then sprinkle it with a little more flour and fold it over on itself once or twice. Cover loosely with plastic wrap and let rest about 15 minutes.
Using just enough flour to keep dough from sticking to work surface or to your fingers, gently and quickly shape dough into a ball. Generously coat a cotton towel or flour sack with flour, wheat bran or cornmeal/ I have tried both flour and corn meal and prefer flour. Put the dough seam side down on towel and dust with more flour, bran or cornmeal. Cover with another cotton towel and let rise for about 2 hours. Back on top of the fridge it goes! When it is ready, dough will be more than double in size and will not readily spring back when poked with a finger.
At least a half-hour or so before dough is ready, heat oven to 450 degrees. Put a 6- to 8-quart heavy covered pot (cast iron, enamel, Pyrex or ceramic) in oven as it heats. We use our smaller cast iron pot and it makes a lovely round loaf that you see above. When dough is ready, carefully remove pot from oven. Slide your hand under towel and turn dough over into pot, seam side up; it may look like a bit messy, but that is what you want. It gives your bread a more rustic look. Shake pan once or twice if dough is unevenly distributed; it will straighten out as it bakes. Cover with lid and bake 30 minutes, then remove lid and bake another 15 to 30 minutes, until loaf is beautifully browned. We get the best results when baking for 30 minutes covered and then 5 uncovered for whatever reason. Just make sure to keep on eye on it and keep in mind, this process is going to teach you so much. It’s kind of like the first pancake, it may turn out a bit wonky. But that’s okay, you’ll know where to make adjustments next time! Cool on a rack and eat with good butter!
Recipe originally sourced in the New York Times.
Katie LifeonVistaStreet Haydock - There are few things in life better than the smell of baking bread, and fresh bread and jam! And winter is certainly the season to be enjoy those things – I agree with you completely.
Stunning photography xXx
Rachel - I baked a loaf this morning and it has been a huge hit! My two year old called it a cookie, so you know its good. Do you mind sharing how you store yours?
Slow (No-Knead) Bread | charlie, tango and mike - […] the recipe for Slow (No-Knead) Bread (original recipe here, if you prefer Imperial […]
On Beeswax Modeling & The Beauty Of Handwork » Homesong - […] things you and your little ones can do together while watching a movie or unwinding after supper. Bread making, rock painting, and playing with play dough are other great handwork ideas you can practice with […]
50 Indoor Crafts & Activities for Young Ones Without Screens » Homesong - […] Bread Dough – Helping Mama: This is a wonderfully simple recipe to make with your little ones. Both Stella and Theo love getting their hands into the dough and flour when we make our loaves. Baking in the kitchen is a great way to practice math skills as well. […]
Getting Back In the Swing + A Post Preview » Homesong - […] Day Farmhouse Bread | Do you have a one day bread recipe? While I love this simple, rustic no-knead recipe by Mark Bittman, I do not love the time involved. I have a recipe to share that I started at 8 am and finished […]
One Day Bread » Homesong - […] since hearing about and making Mark Bittman’s wonderful no-knead bread, I’ve been hooked on making my own loaves at home in the comfort of our kitchen. I am no […]